
Intro
- If we use an AI agent incredibly well and set up a Harness perfectly, will a service magically be created with just a single 'click'🖱️? It seems unlikely to reach that level, at least by '26. Anyone with even a little interest in UI/UX is bound to give feedback like, "move this over here."
- The service I'm introducing today, Agentation, is for just that. Personally, I can feel that my Frontend workflow efficiency has improved significantly since I started using Agentation.🤗
1. Agentation?🧐
-
Agentation is a tool created not by a developer, but by a designer named Benji Taylor. It's a service designed to make it easy to command an Agent to perform Frontend modifications on web pages using React 18+. In other words, as long as you're using React 18+, you can also use it with Next.js.
-
As you'll see if you visit the homepage, perhaps because his main job is a designer, the design is very simple yet stylish. In particular, the animation of a moving rabbit made of ASCII code that you see upon entering is insane... (Totally my aesthetic..🎯)
2. Installation 📍
-
Install it in your project's directory with the command below!
npm install agentation-mcp # or pnpm add agentation-mcp -
Next, run
npx add-mcp "npx -y agentation-mcp server"in your Terminal. This will allow you to select and install the agent you are using.- You can select multiple agents by pressing the Space Bar. Then press Enter!
-
Type
npx agentation-mcp doctorand if you see the output below, the installation is complete!✔️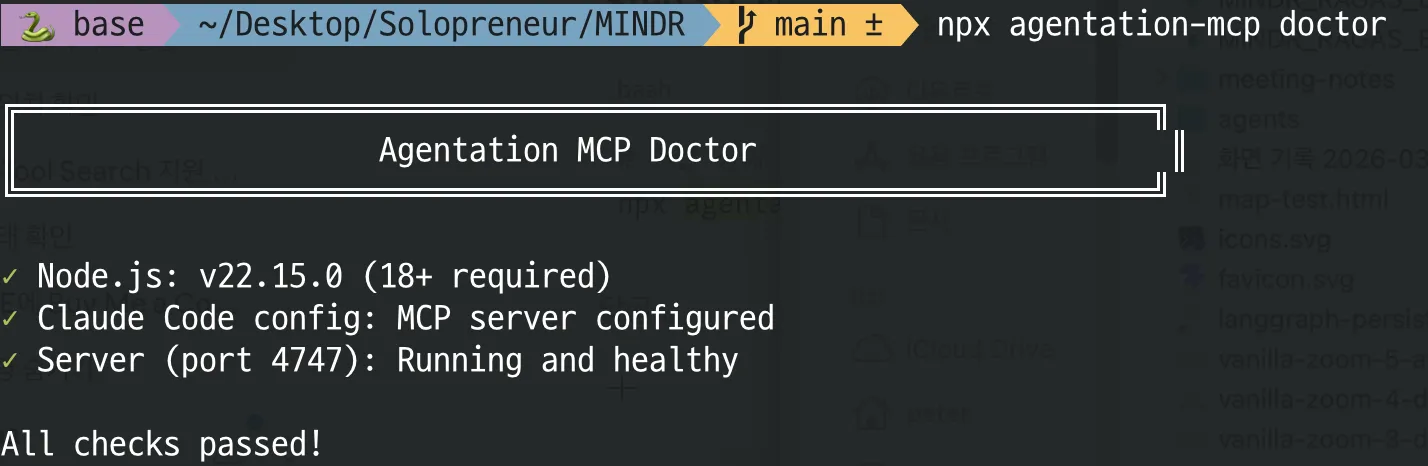
3. Settings 🍽️
-
You only need to set it up once in the project you're using. :) It's really simple!
-
First, let's add the code to the RootLayout of your React / Next.js project to run Agentation only in development mode. For Next.js, import Agentation at the top of the
layout.tsxfile (which corresponds to the RootLayout), or for React, inmain.tsx.import { Agentation } from "agentation"; -
Add the following to your RootLayout!
{process.env.NODE_ENV === "development" && <Agentation />}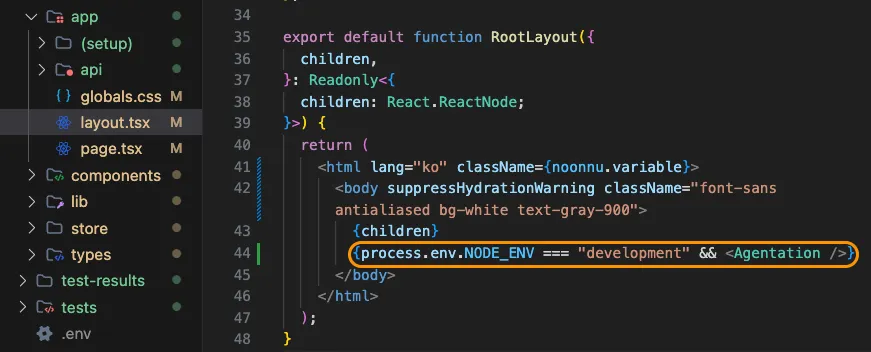
-
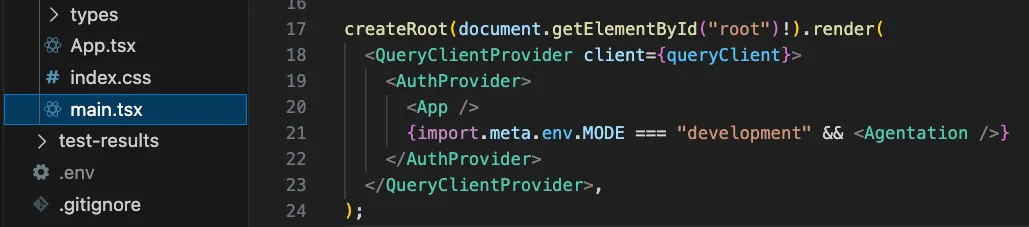
If you're using React with Vite, you can add it like this.😉
- Instead of
import.meta.env.MODE === "development", you can just useimport.meta.env.DEV.
- Instead of
-
After that, running
npm run dev / pnpm dev / vite devwill automatically launch Agentation in development mode.🤗
4. Basic Usage 🖱️
-
Now, when you start development and go to localhost, you'll see a small round friend in the bottom right corner.
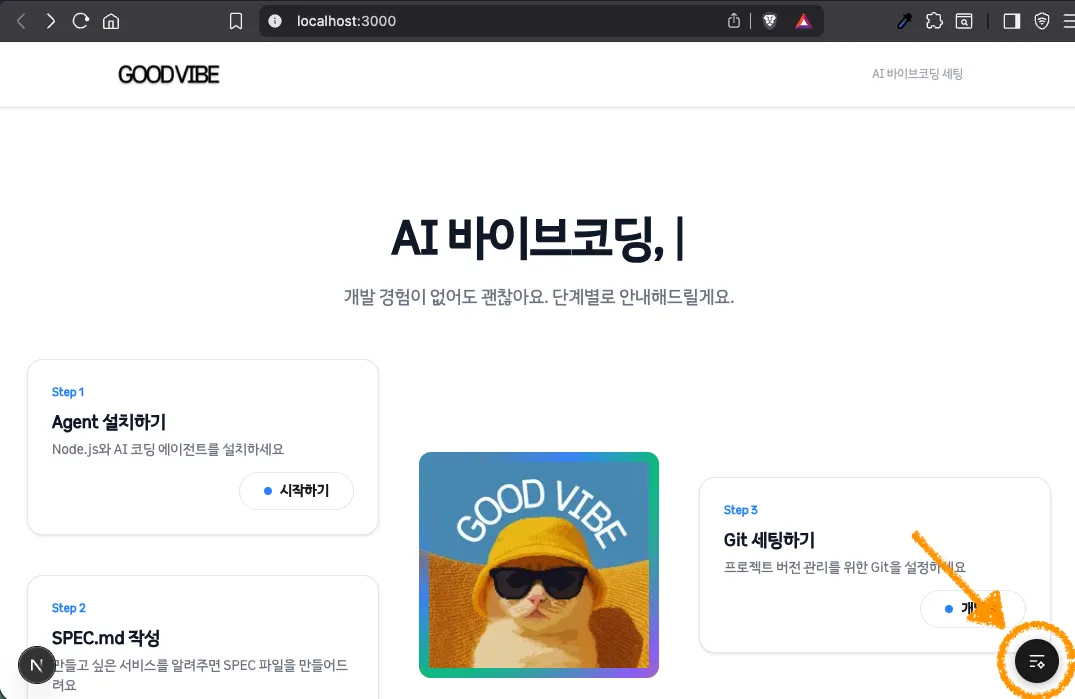
- Click the circle as shown below.
- When you hover over an area you want to edit, it automatically recognizes the Component and you can add an annotation!😮
- You can also drag over an empty area to leave an annotation. 👍
- Once you've left an annotation, you can copy it by pressing the 'Copy Feedback' button or by pressing 'C' on your keyboard.✨

- Just take the copied annotation and paste it into the Agent you're using, and you're done!
- When you paste it, you can see that the annotations you created are structured to be easily understood by the Agent, providing location information.🫢
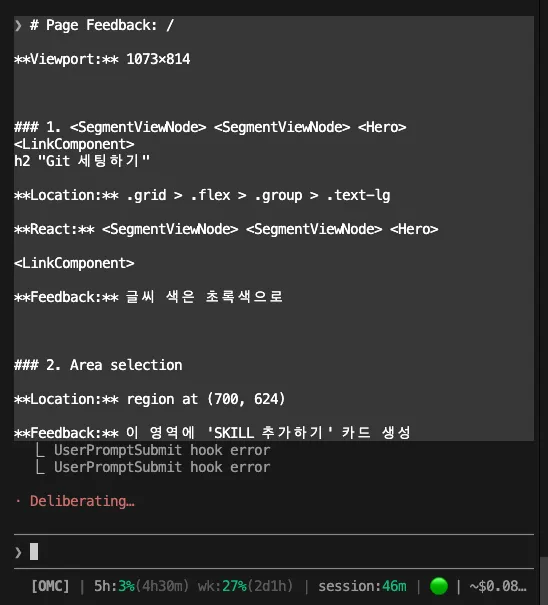
-
It works very well!

💡 TIP
-
After copying and pasting, it can be annoying to see the previous annotations still on the screen when you return. In this case, check the
Clear on copy/sendoption in the settings⚙️ to have annotations automatically disappear after being copied.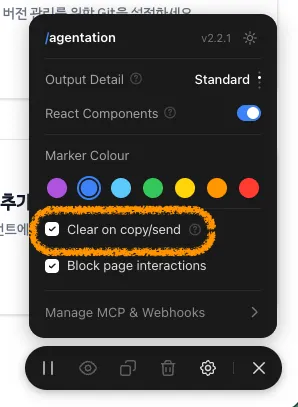
5. Hands-Free Mode 🌴
- The ability to communicate with the Agent by copy-pasting is already something to be thankful for... but for someone like me who finds even that a bit tedious, as expected, there's a Hands-Free Mode, seemingly just for me(?)!🫢
- Now, you can just write an annotation and press Enter, and the feedback will be automatically sent for modification! 😮
1. CLAUDE.md / AGENTS.md
-
Let's add the following prompt to
CLAUDE.md/AGENTS.md, which tells the agent that when I say'watch mode', it should automatically receive and apply modifications in real-time via MCP.## Agentation Integration When I say "watch mode", call agentation_watch_annotations in a loop. For each annotation: acknowledge it, make the fix, then resolve it with a summary. Continue watching until I say stop or timeout is reached.
2. Running the Local MCP Server
-
Let's open a Terminal and run the command below. You can change the port from 4747 to 8080 or something else.
npx agentation-mcp server --port 4747
-
Now, we need to let the Frontend know the local MCP Server address! Let's do this by adding the endpoint prop as shown below!
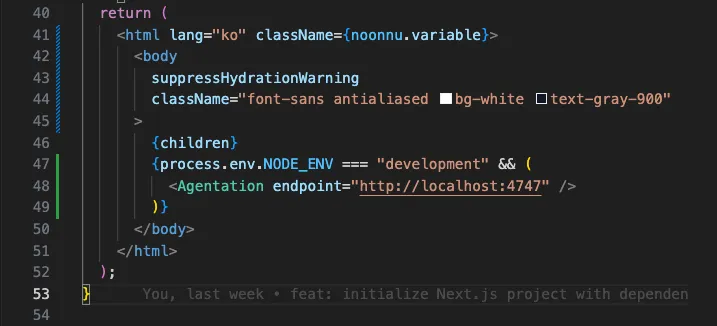
-
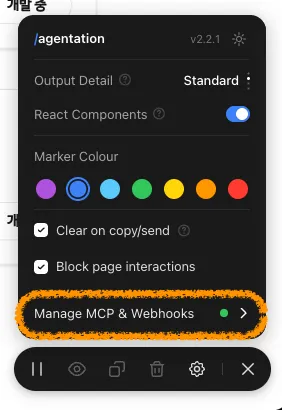
If you go back to the Agentation settings⚙️ on the Frontend, you should now see a green light in the MCP section. If you see it, the setup was successful.🥳
-
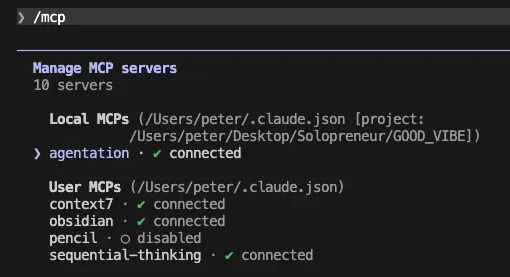
After restarting Claude Code, I can confirm that it is correctly recognizing the local Agentation MCP.
3. Have Fun Pointing Things Out 🫵
-
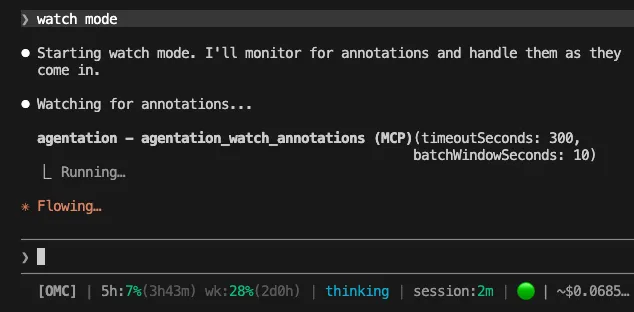
Alright, let's enjoy Hands-free Mode.😎 When I tell Claude Code 'watch mode', it goes into a waiting state like this!
-
Then, as you start requesting modifications, as soon as you point something out,
- The Web Front Agentation notifies the MCP Server that an annotation has been added.
- The Agent, which is watching the MCP Server, retrieves the annotation from the server.
- After finishing the modification, it sends a message in the order of MCP Server 👉 Front to resolve the annotation!
😆 This is truly the best...

Wrap-up 🍳
- It's truly a great season for developing.🥹


0 comments
Please login to leave a comment.