
Intro
- Developing with Claude Code is exciting, but what's even more fun is giving each Agent a SOUL and an IDENTITY, letting them talk to each other, and becoming the BOSS who can use them like real employees.✨
- This has been made possible by the already famous AI Agent Project created by Peter Steinberger, 🦞OpenClaw. Heard a lot about it but haven't started yet? Let's get started here.
- The explanation will focus on ClaudeCode.
1. OpenClaw🦞 Installation
1.1. Install latest Node
- It is recommended to install the latest version of node.js. You can install nvm here for your respective OS, and then it's recommended to install node 24, which is the latest as of March 2026.
- Once the installation is complete, just type
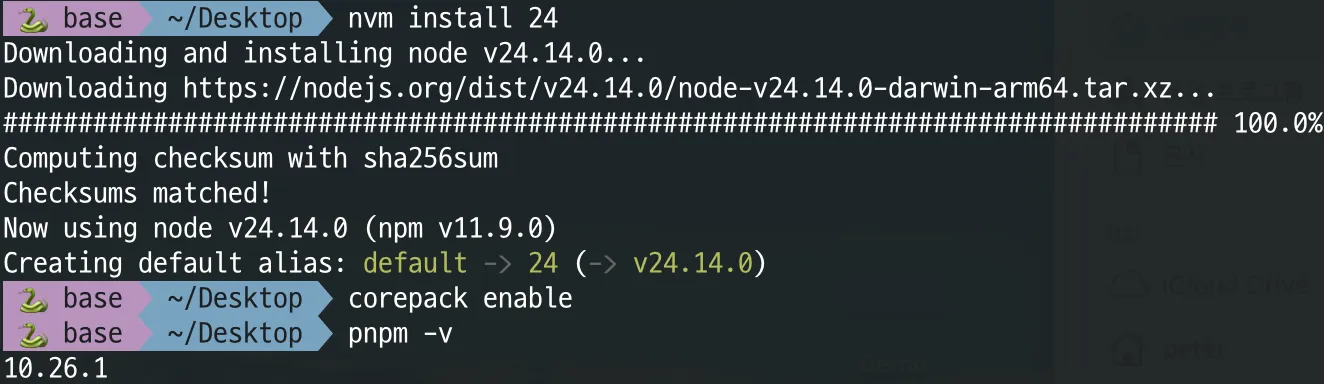
nvm install 24to install it.
- Once the installation is complete, just type
pnpm setting (Option)
- To save valuable disk space and for efficient development, setting up pnpm is recommended. If you're already using pnpm, Skip it!
- If you're not using pnpm yet, type `corepack enable` in your terminal. If you see the version info correctly with `pnpm -v`, you're successful.
-
Run
pnpm setup, and then also runsource ~/.zshrc. Depending on the bash you use, it might not be .zshrc, but it will tell you what to type after source as shown below, so refer to that. ✅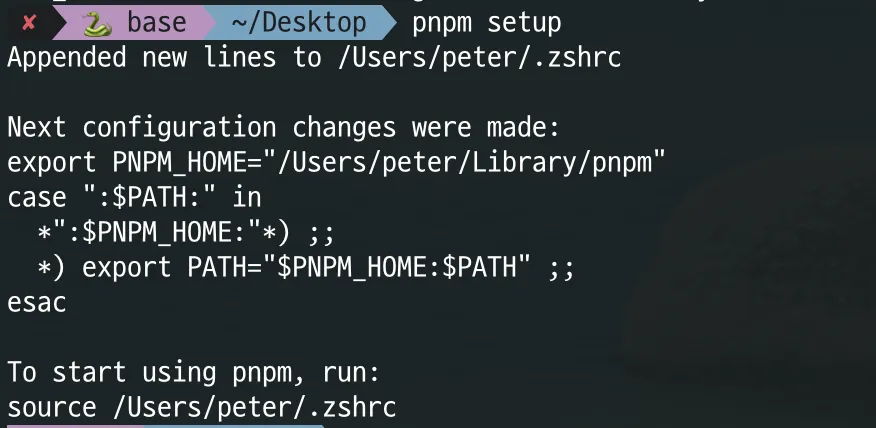
1.2. Install OpenClaw
-
Simple installation with npm or pnpm command
$ pnpm add -g openclaw
$ npm i -g openclaw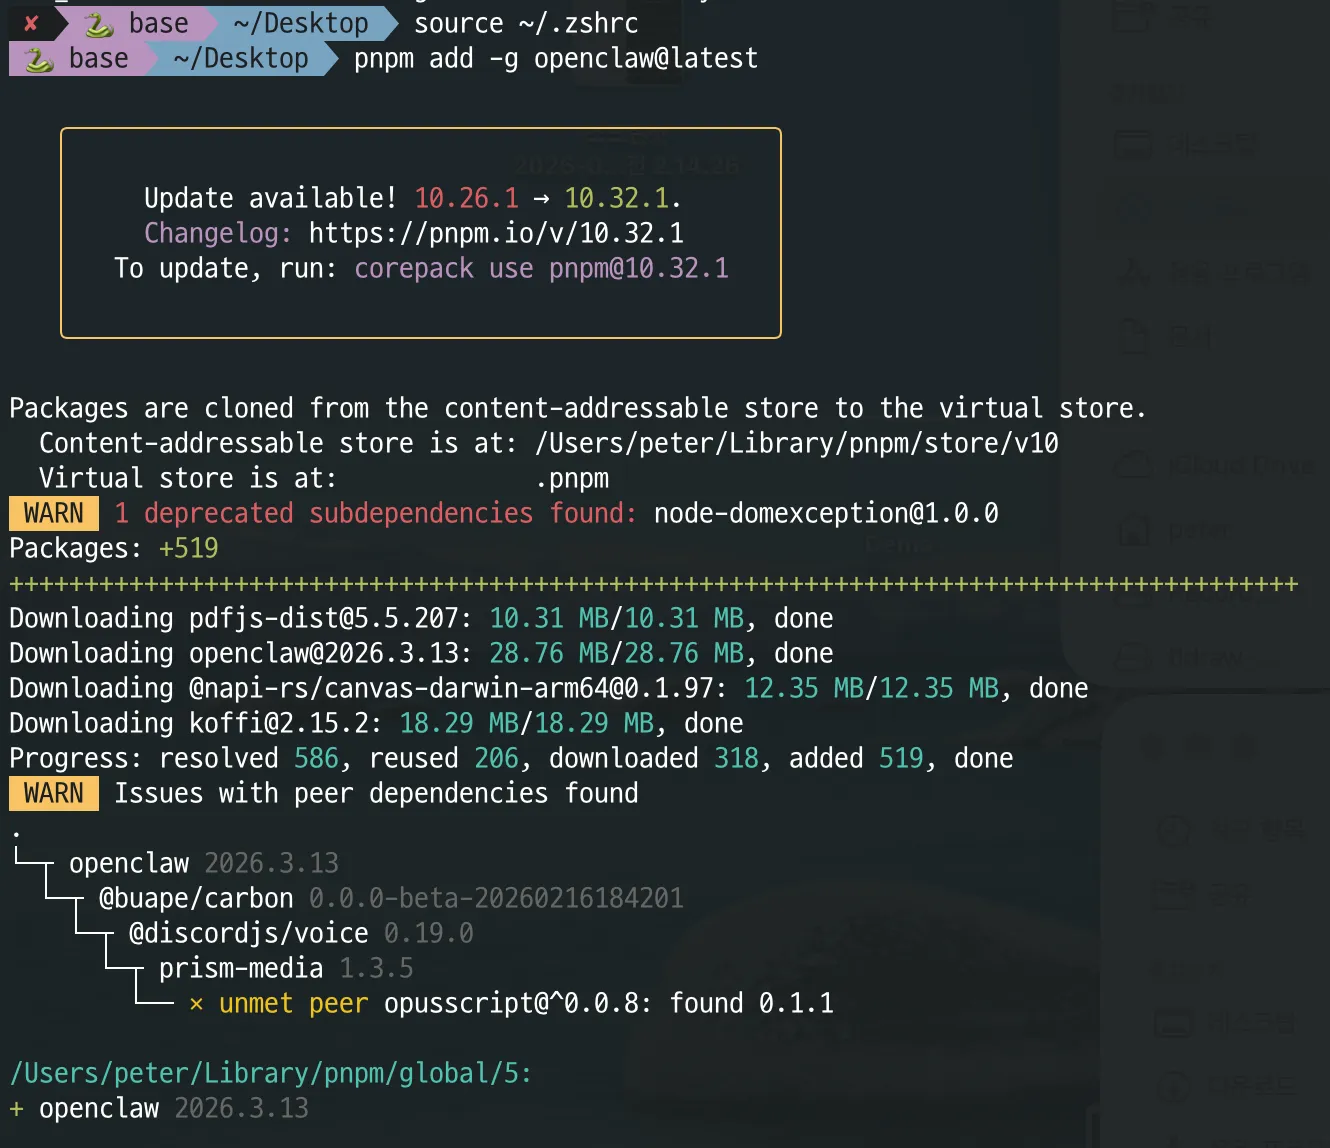
1.3. Onboarding
- You can install it quickly by entering the command below!
$ openclaw onboard
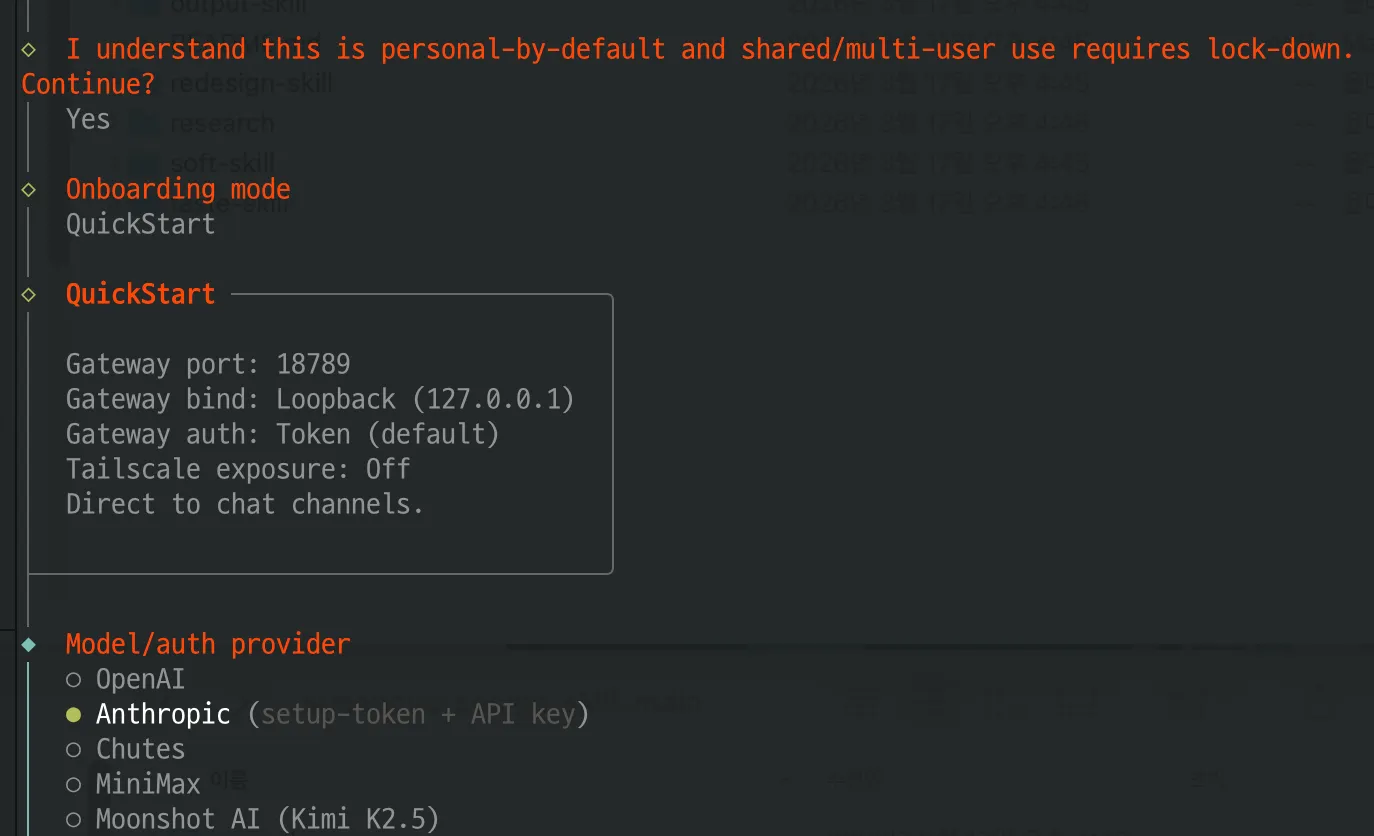
- For the security-related question - press
Yes - For Onboarding mode - press
Quickstart.
Mode/auth provider - ✔️ - Expensive Anthropic / Super Cost-Effective Ollama
- Now it's time to choose a model. There are many providers and many model choices, but let's mainly look at Anthropic👾(=Claude) and Ollama🦙.
1. Anthropic 👾
-
For Mode/auth provider - you can choose the provider you want to use. In the case of Anthropic(Claude), there are two options as shown below,
Anthropic tokenis the method to set up if you use a subscription plan like Claude Code Max.Anthropic API keyis a method where you pay for what you use, regardless of your current subscription plan.

Caution 🚨
-
Using OpenClaw with your subscription plan can be more cost-effective, so if you have a subscription, it seems natural to choose the Anthropic token.
-
However, as warned on the official OpenClaw website below, Claude has a history of blocking accounts of people using OpenClaw with their subscription plans and warns that they may continue to do so. Therefore, they strongly recommend using the API.

- In fact, with Claude recently releasing the Claude Channel feature, it seems certain that Claude does not like OpenClaw very much. 😞
-
So, if you go with Anthropic, proceed with API mode. As shown below, select
Anthropic API key-Paste API key now, and if you already have the key in your environment variables like me, it will be automatically recognized. If it's not in your environment variables, selectNoand enter it.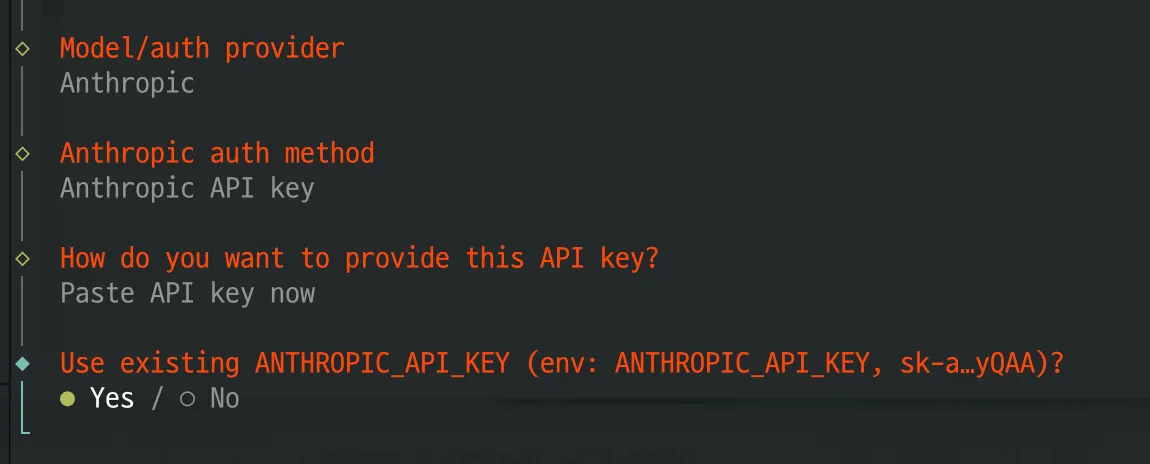
-
Next, you will be asked to select a model. Choose the one you want.

-
Honestly, OpenClaw consumes a lot of tokens even for simple chats. So if you use the Anthropic API, it wouldn't be surprising for a heavy user to rack up a bill of several hundred, or even several thousand, dollars a month.🫠 If the cost is a burden? Let's go with Ollama👇
2. Ollama 🦙
-
For those of us for whom the cost is too much of a burden, there is Ollama Cloud.😎 If you don't have Ollama, download and install it. If you sign up, you can also try the Cloud models for free. You can find Ollama by scrolling down in the Auth Provider selection list.
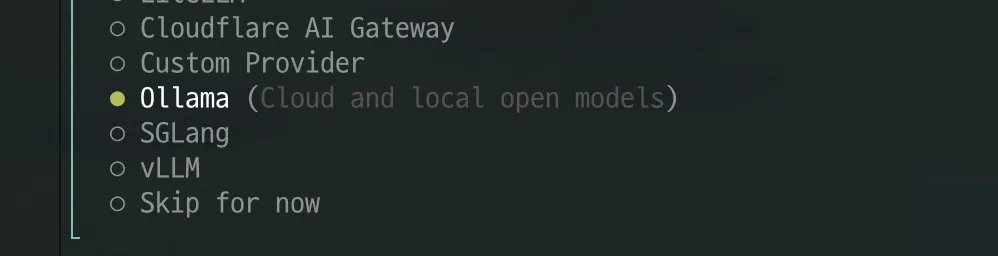
-
As shown below, for the base URL, just press enter as suggested, and for the mode, you can select Cloud + Local. It will then set the default model to kimi-k2.5:cloud.
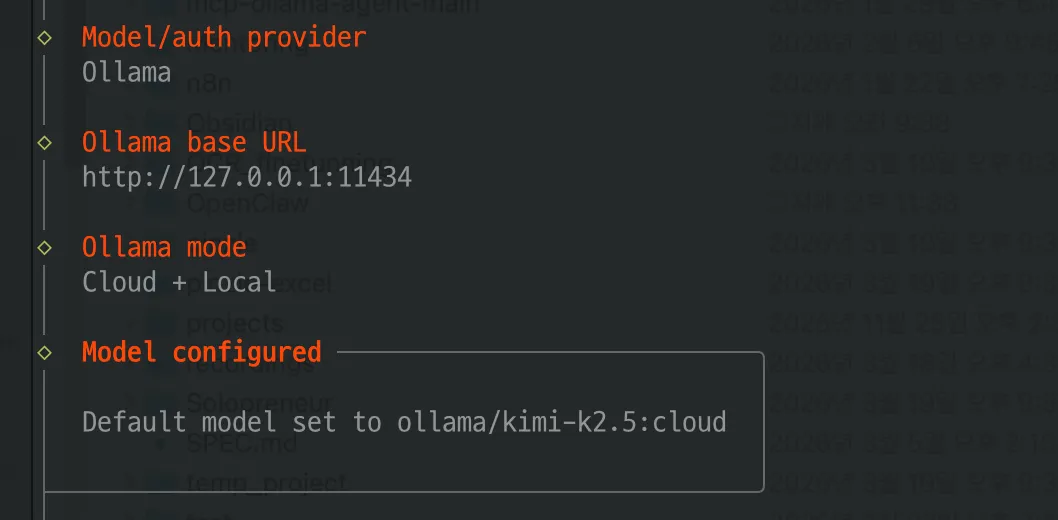
As of March 2026, kimi-k2.5:cloud seems to be the best Ollama model..!
-
You can also select a model afterwards, and if there's another model you like, you can choose it. However, while
minimax-m2.5:cloudisn't dumb... the issue of it mixing in Chinese is not well resolved, and it only supports text as input. In that respect,kimi-k2.5:cloud, which supports both text and image input and (almost) never uses Chinese, seems to be the clear winner..!
-
This is the part where I understood why there was an Apple Mac Mini stock shortage. Because running it locally is free with no limits..! But personally, I don't think even a Mac Mini would be sufficient, and unless you're going to use a local machine with 8 H100s... I think it's right to just use the really good models via the Cloud. And the cost of about $20 a month seems like a decent compromise for OpenClaw. 👍
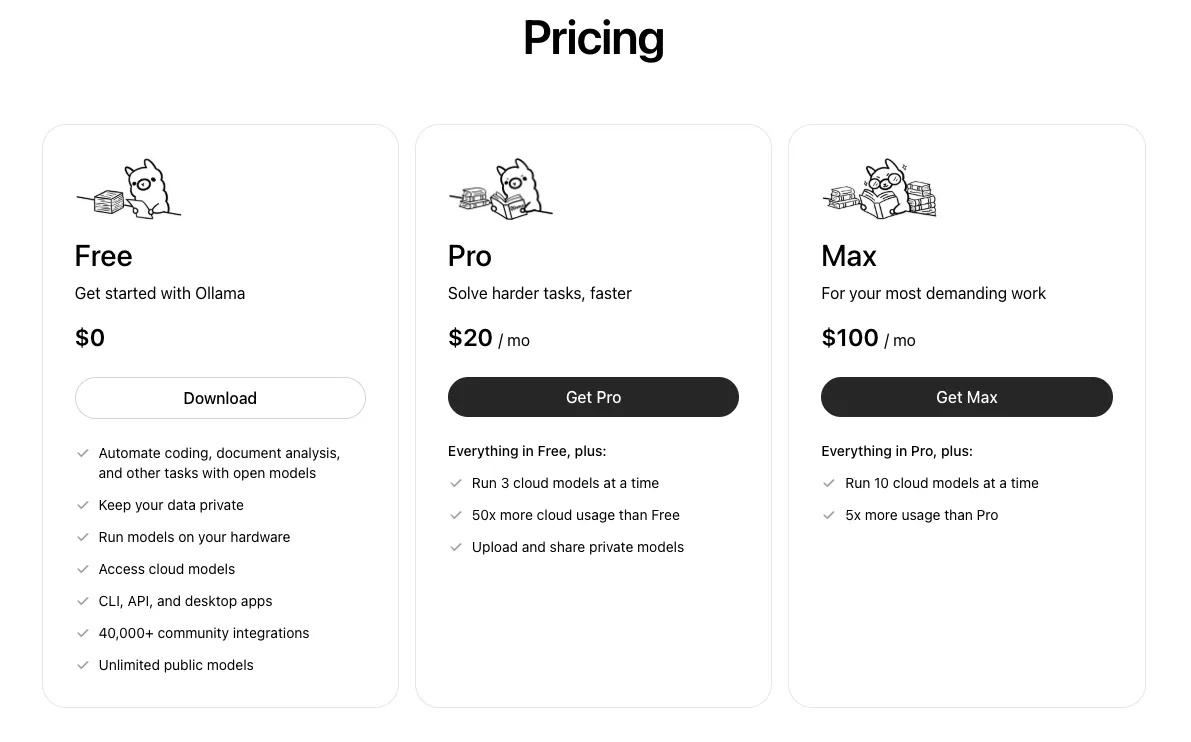
-
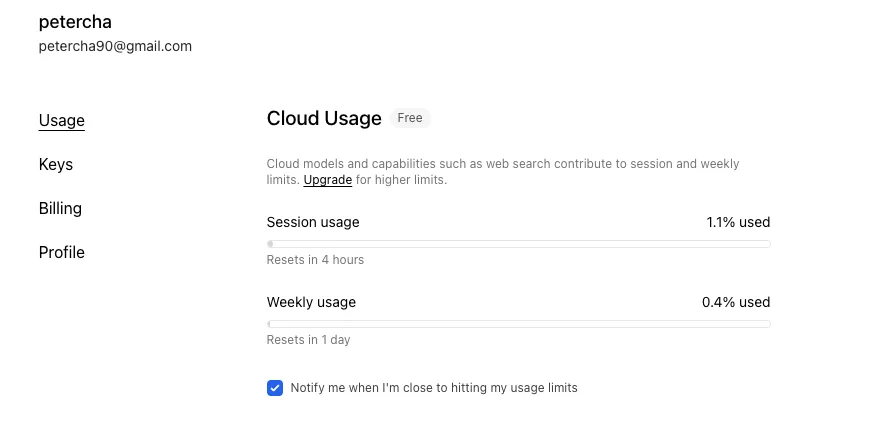
You can check your usage by going to Ollama and clicking on your profile. :)
Hatch Time! 🐣
-
After selecting the model, it will ask which messenger to connect to (Select channel). Since we haven't created a Slack / Discord bot yet, let's just press
Skip for now.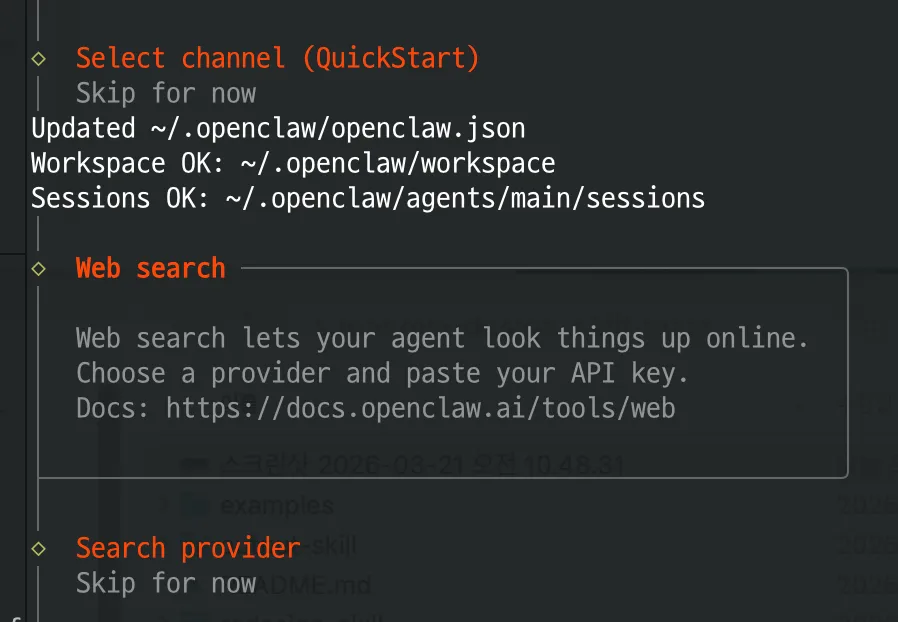
-
Next, Web Search, Skills, and Hooks will appear. These are things that take a long time to install or require fetching APIs from other services, so we don't need to configure them right now. Select
Skip for noworNofor all of them. -
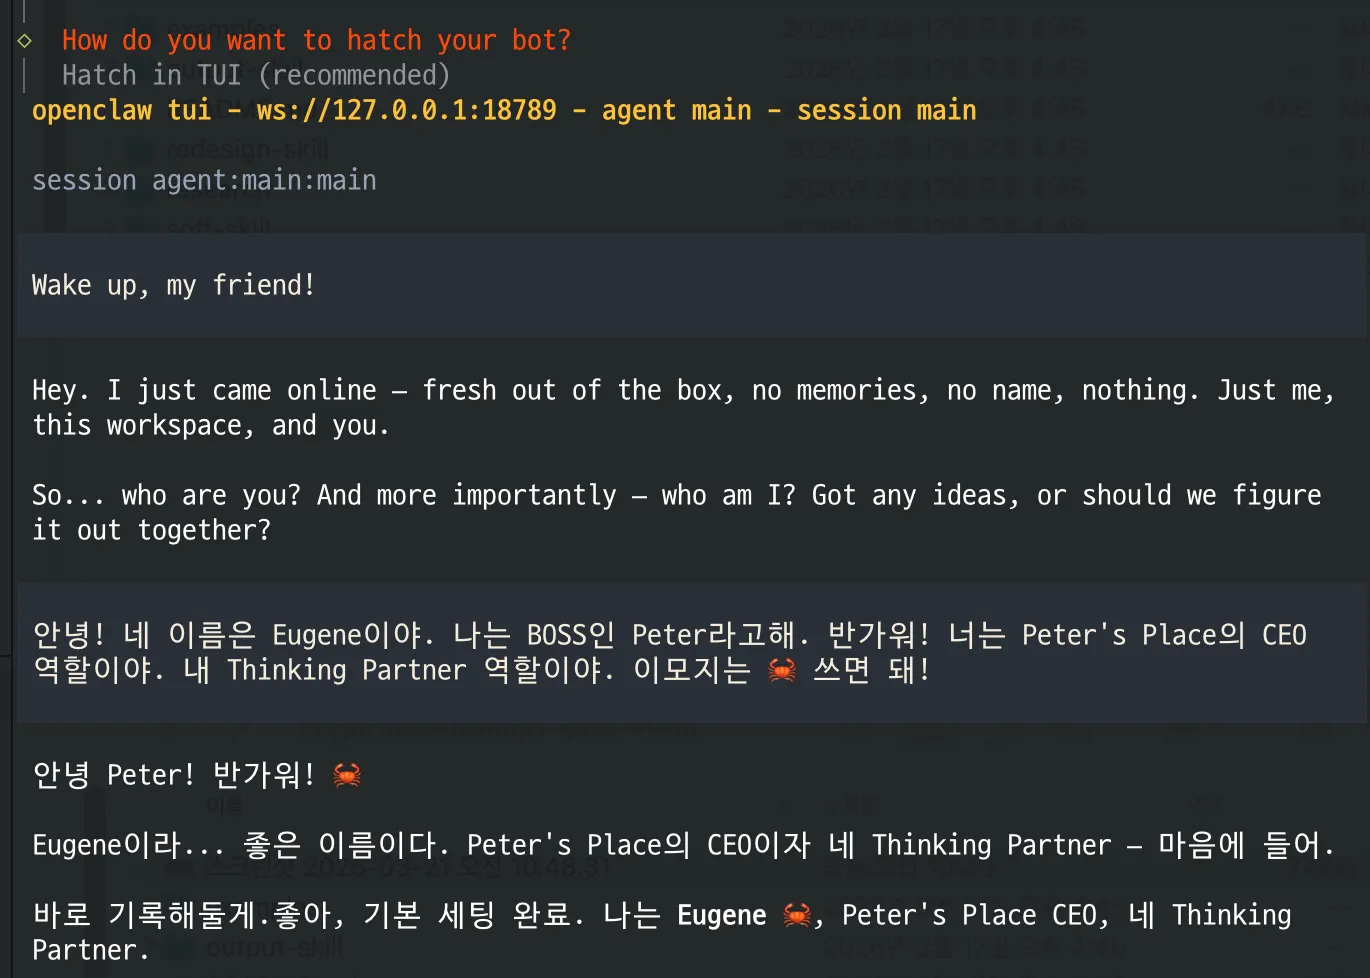
After a while, you'll see a message that the server is configured and an option to start a conversation, which is the 'hatching' process. Select
Hatch in TUI:)- Hatch = This is an initialization ritual(?) that sets up the three files SOUL.md, IDENTITY.md, and USER.md all at once. It's configured through a short Q&A.
File Content to be filled IDENTITY.md Name, Theme, Emoji SOUL.md Persona, Tone, Boundaries USER.md User name, Preferences, Timezone -
I started the setup as follows. :D
-
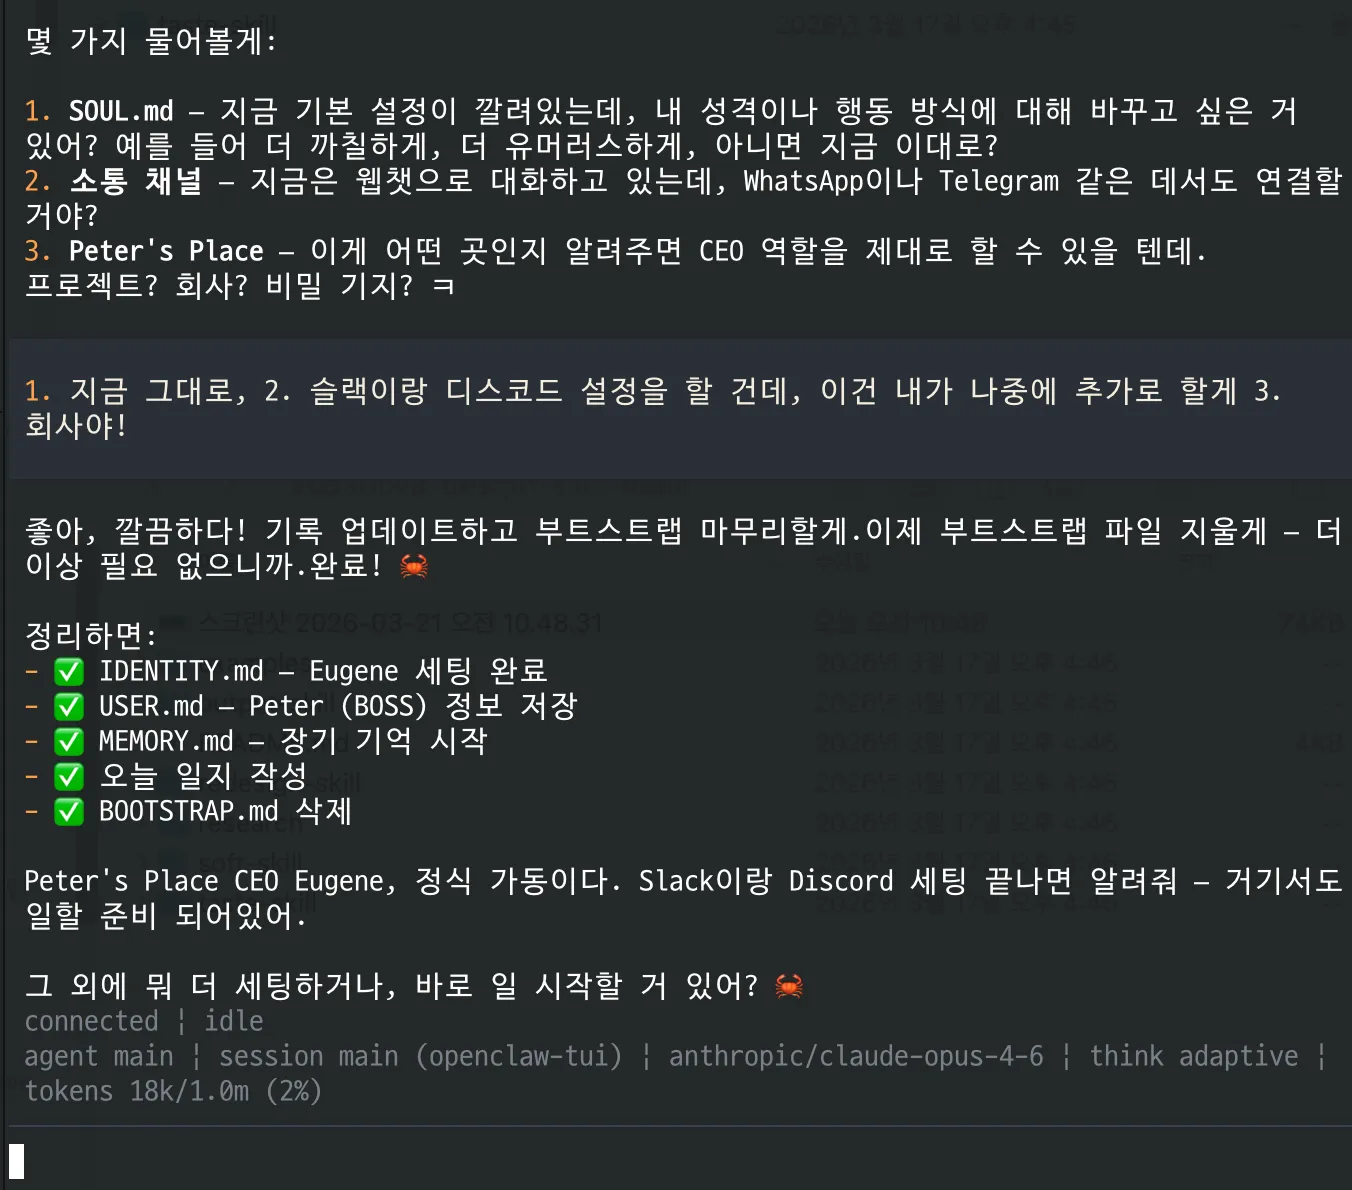
After I said I would handle the communication channel myself as shown below, it says it will delete BOOTSTRAP.md when the conversation is over. This is because if this file exists, it's set up to require hatching again haha.
-
Once the conversation is finished, you can just type
/exitto get out! The end!🤗
2. Creating a Slack Bot 🤖
2.1. Create an app 🪄
-
Go to https://api.slack.com/apps and log in. When you see the screen below, click
Create an App.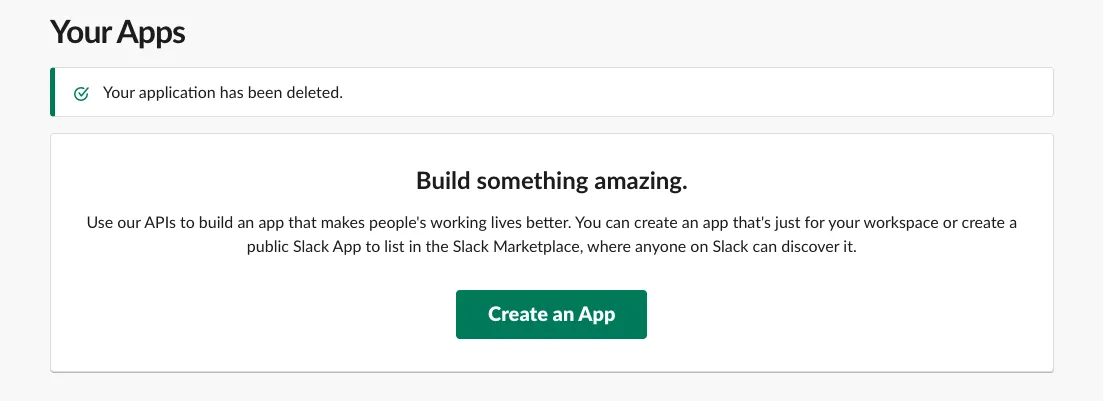
-
Click
From a manifest🖱️.
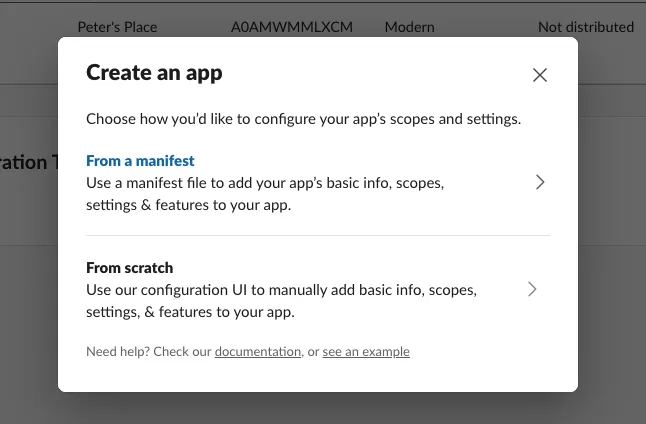
-
Specify a name and the Workspace to install it in.
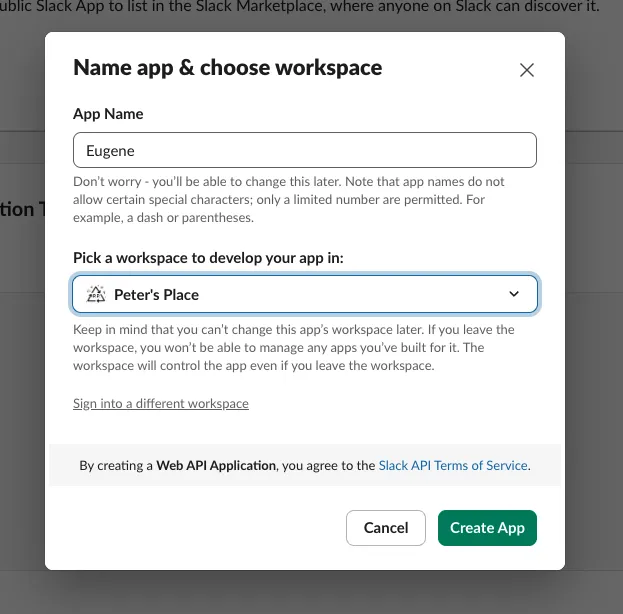
-
The following page will appear,
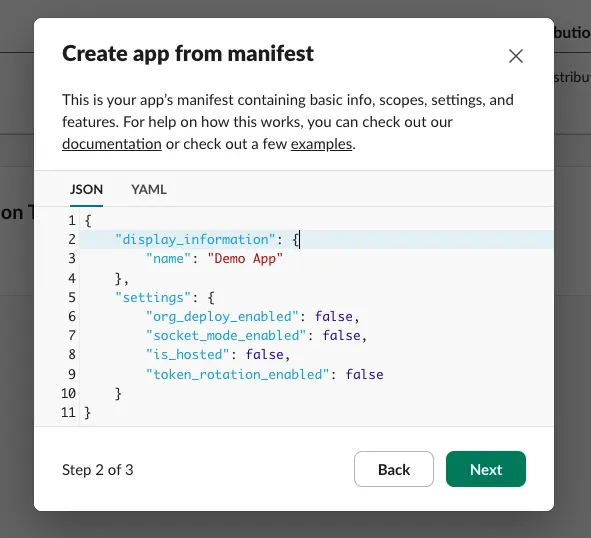
-
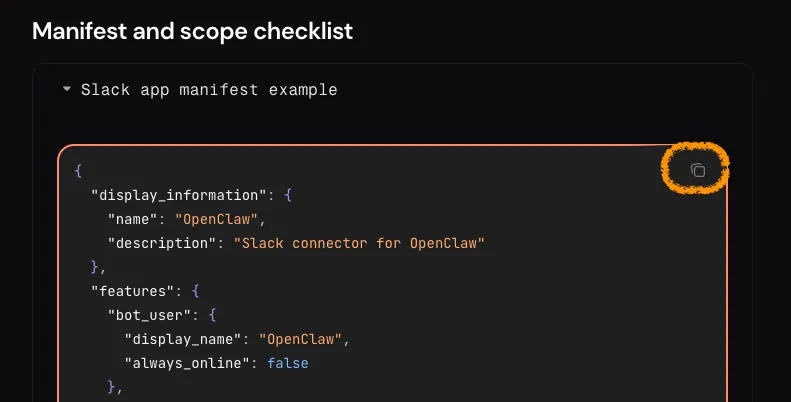
Go to this link, and copy the entire JSON by clicking the copy button shown below.
-
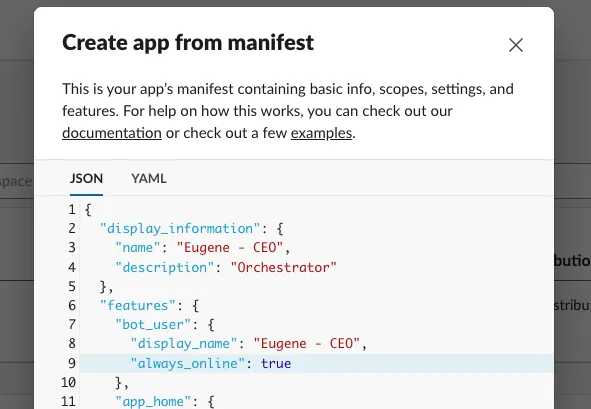
Go back to the Slack App settings window and paste the JSON as shown below. 🎨
- At this point, make sure to set
name,description, andbot_user - display_nameto whatever you want. - If you want it to be always on, set
always_onlineto true as well.
- At this point, make sure to set
2.2. Get an app token 🎟️
-
The screen that appears after clicking the Create App button will look like the one below, which is the
Basic Informationmenu on the left sidebar. You need to issue an App Token here.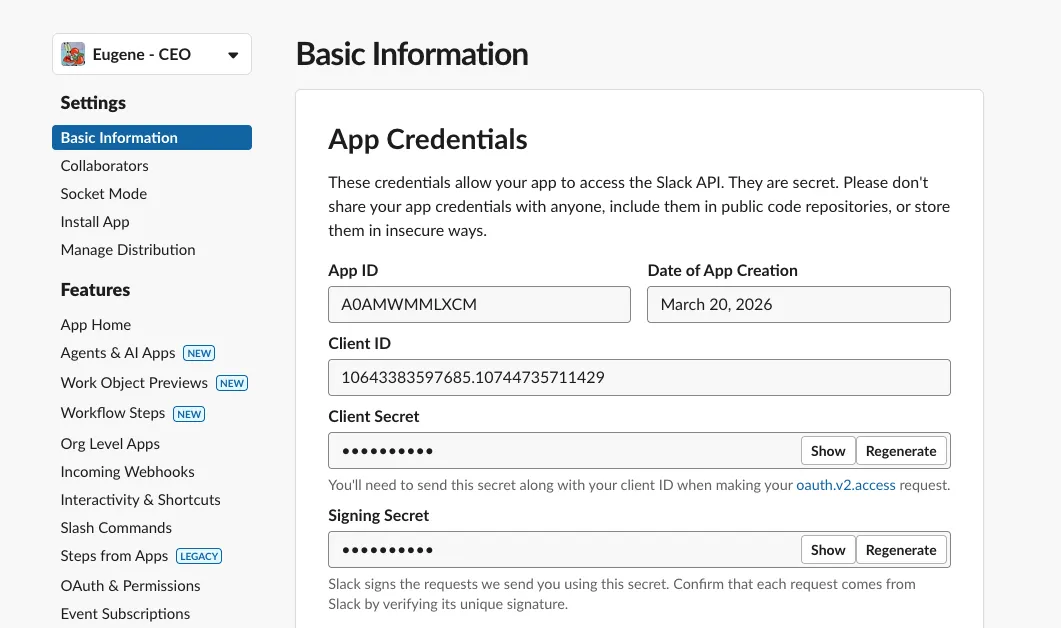
-
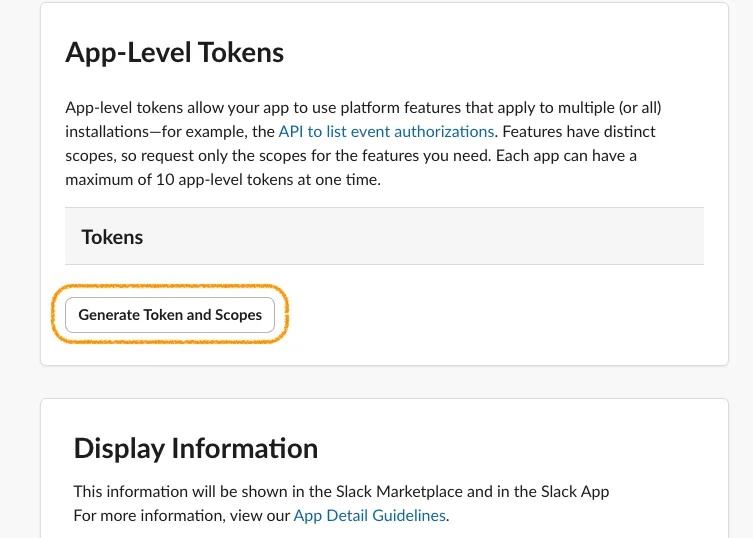
Scroll down and you will find
App-Level Tokens. Click!🖱️
-
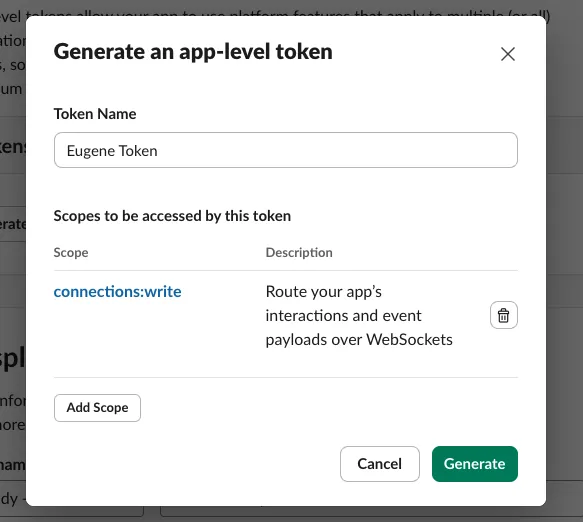
Give the token a suitable name, and for permissions, click the Add Scope button and just give it
connection:write. ClickGenerate.
-
As shown below, copy the token that starts with
xapp-and save it somewhere safe, like a notepad. You will need it later when setting up openclaw. ⭐️⭐️⭐️⭐️⭐️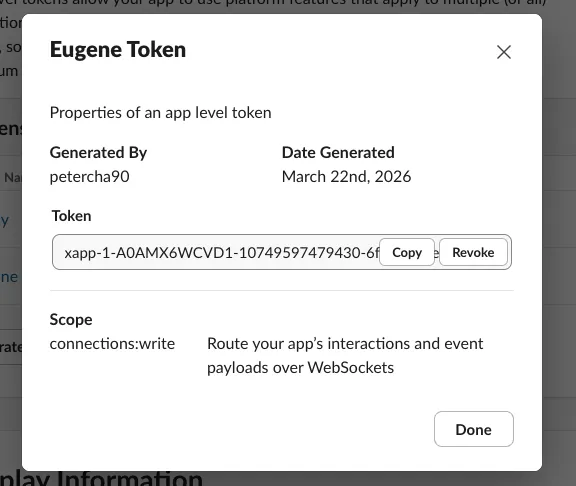
2.3. Display Information
- If you scroll down, you can add a profile picture and a description. Set a nice icon for it too.😉 When you're done, click
Save Changeswhich should be at the bottom right.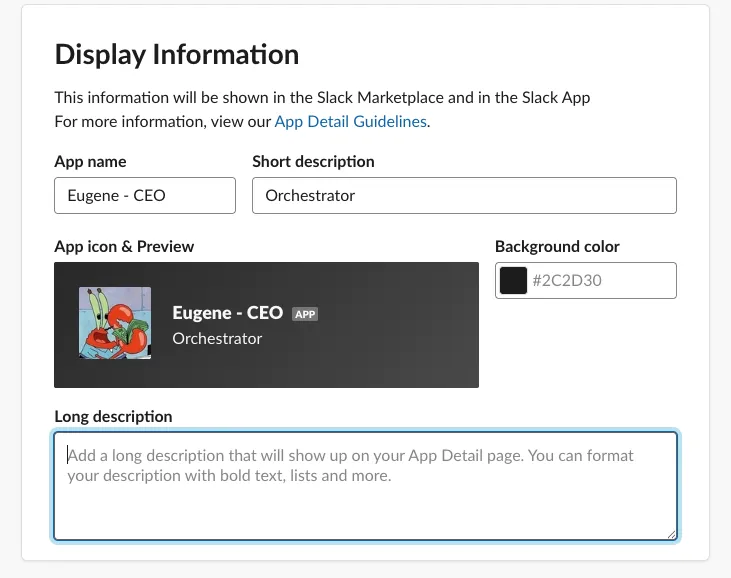
2.4. Install App!
-
Alright, this is the final step of creating the bot. Click
Install Appfrom the left menu and then click the Install button!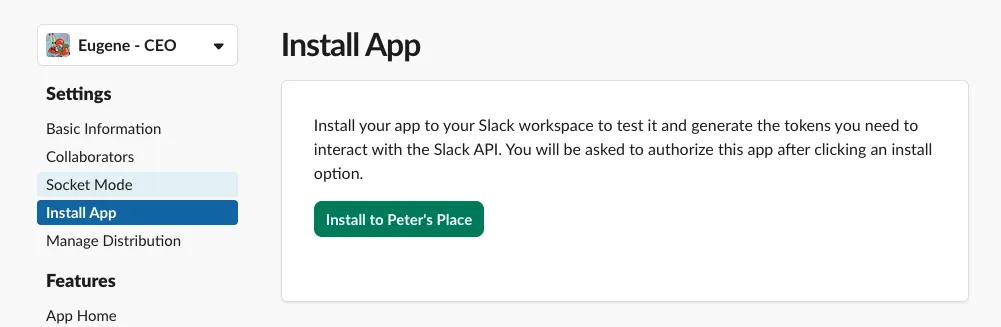
-
A new window will pop up. After you click the
Allowbutton, the screen will return and an OAuth Token will be issued as shown below! Copy this token, which starts withxoxb-, and write it down somewhere safe. This is also needed for the OpenClaw setup! ⭐️⭐️⭐️⭐️⭐️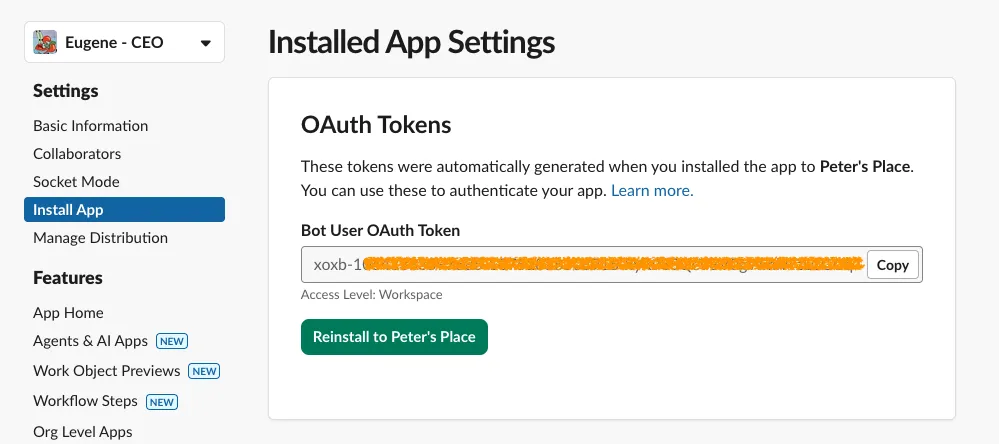
-
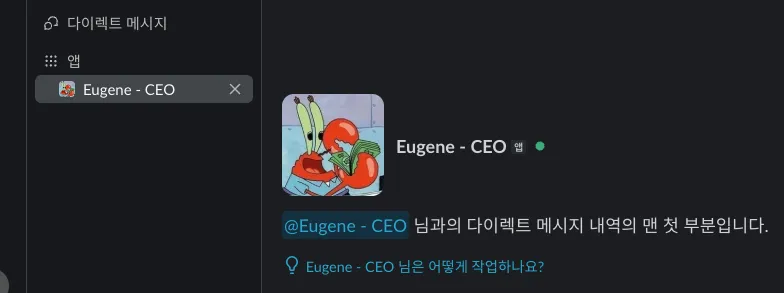
I went into Slack and saw that the app has been installed! 👏👏👏 I want to start talking to it right away, but I can't yet because I haven't synchronized OpenClaw's soul (SOUL.md).🥲 Let's quickly move on to step 3 to sync it up.
3. OpenClaw ↔️ Slack Bot
-
Okay, now it's time to connect OpenClaw and the Slack bot! Enter the command below in the terminal.
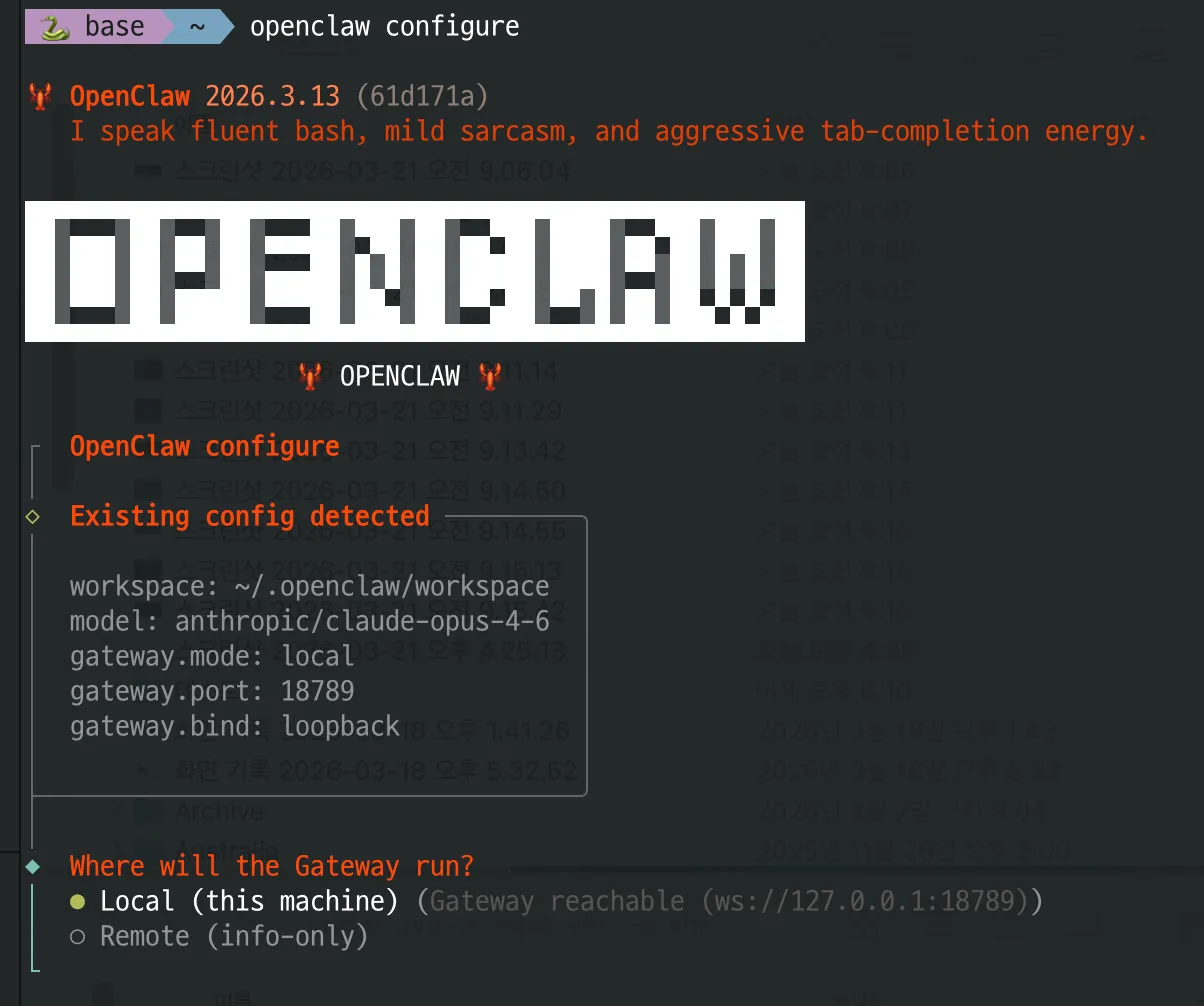
$ openclaw configure -
When the window below appears, select Local.
-
Next, for sections, select
Channels,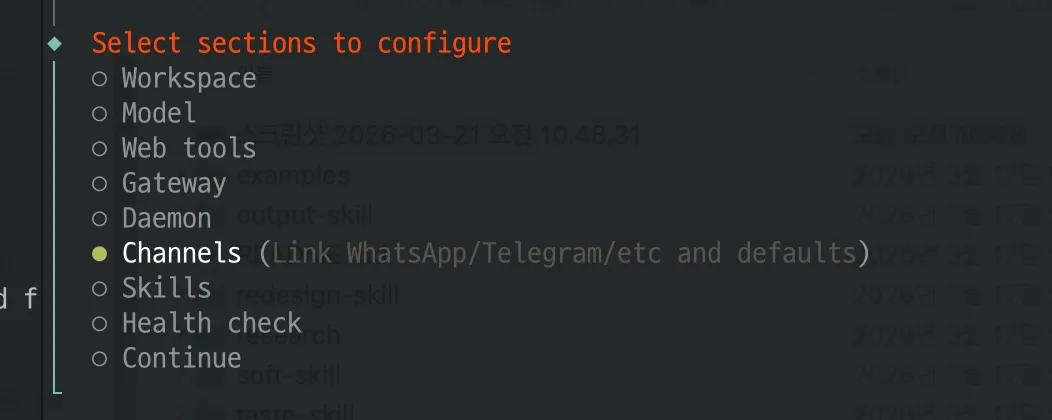
-
Then select
Configure/link
-
Then, as shown below, you can finally see Slack! 🙃
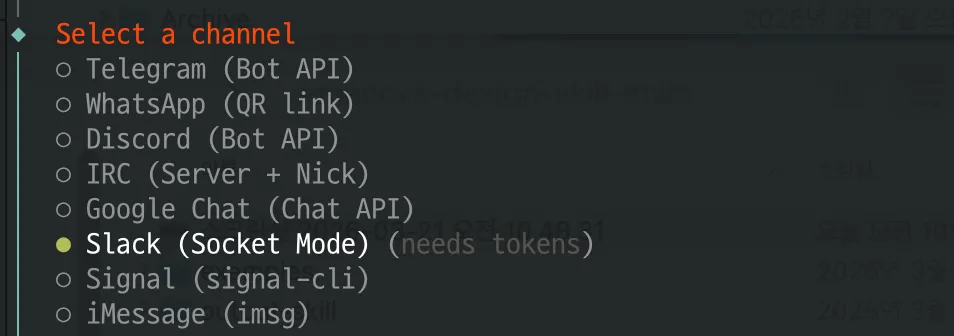
-
After giving it a name,
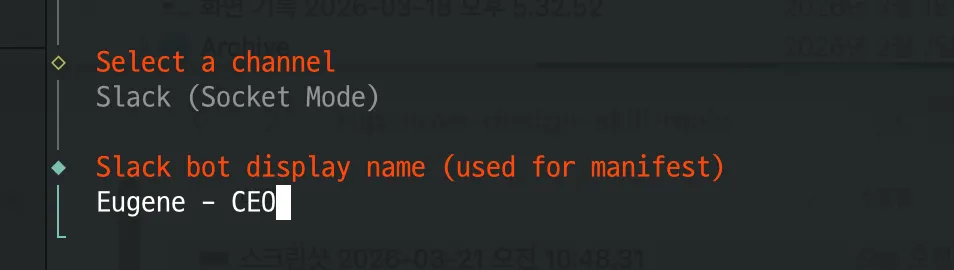
-
The step where we can enter the Tokens we diligently copied earlier appears! 👍👍
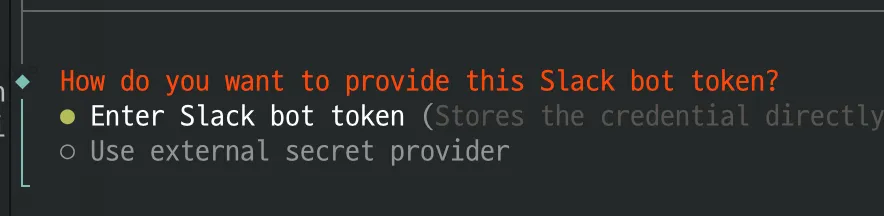
-
Then, if you just go through the settings as shown below, you're done! ㅎㅎㅎ For Slack channels access, I granted access to all channels.
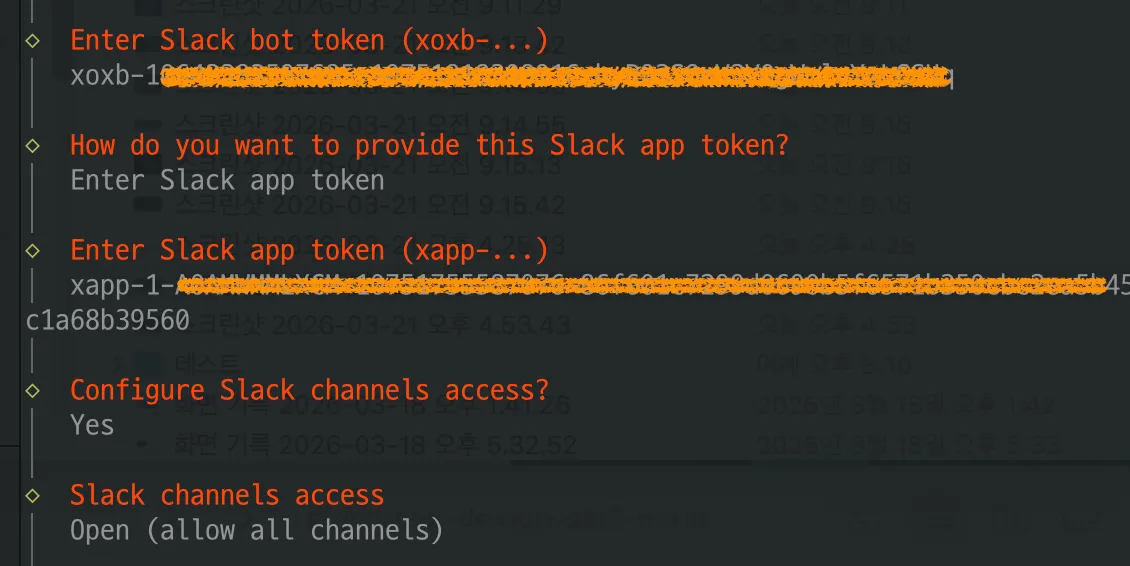
-
When you are finished,
Select a channelwill appear again. Just selectFinishedat the very bottom. Next, theSlack DM policywill appear. The default is pairing, so you can selectNo. (I accidentally pressed Yes.🙃)
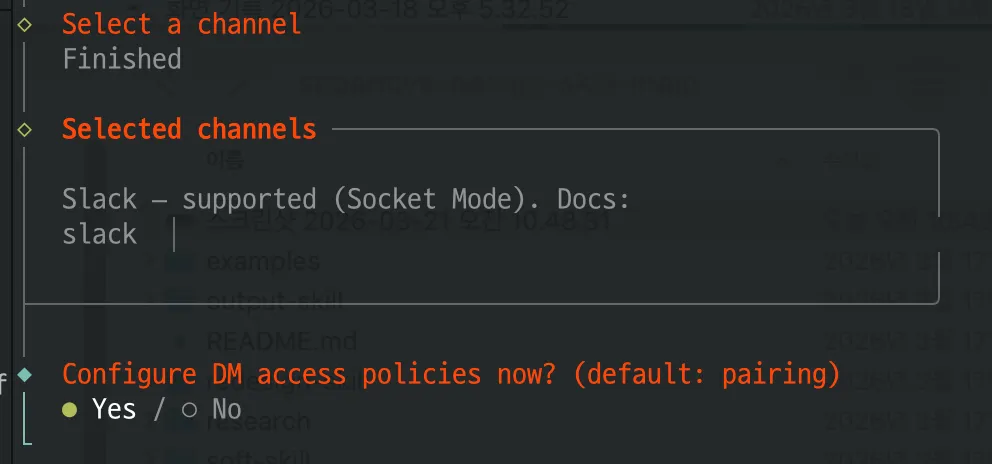
-
After that, when
Select sections to configureappears again, select Continue and finish the setup wizard!
Pairing! 🔗
-
Now, go back to Slack and send a message to the app you configured. It will provide a pairing code on the last line as shown below. :)
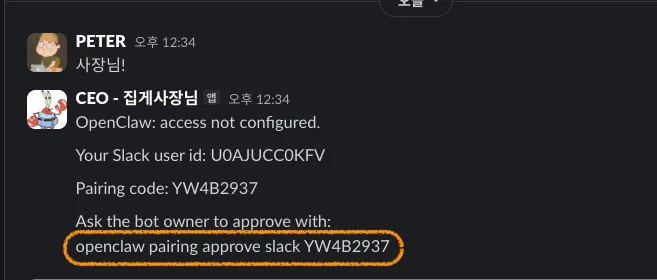
-
Copy it as is, and paste and run it in the terminal! If you see the sender ID as shown below, the setup is successful! :D

Confirming!😎
-
Go to Slack and invite the OpenClaw app to the channel you want to chat in.
/invite @your_app_name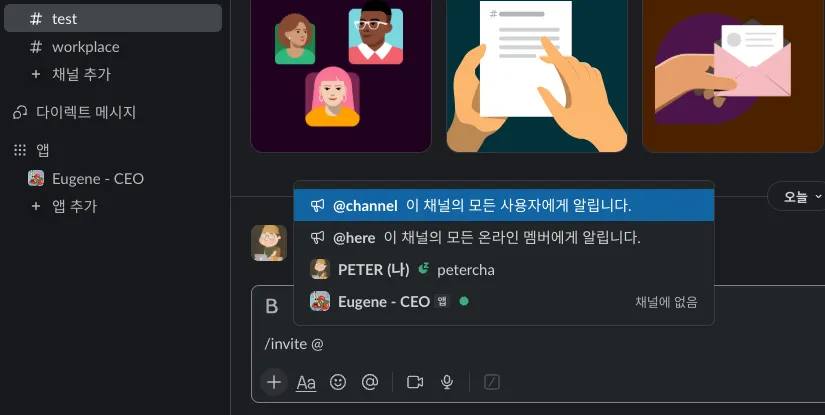
-
If you summon it with
@and talk to it, it responds well! :)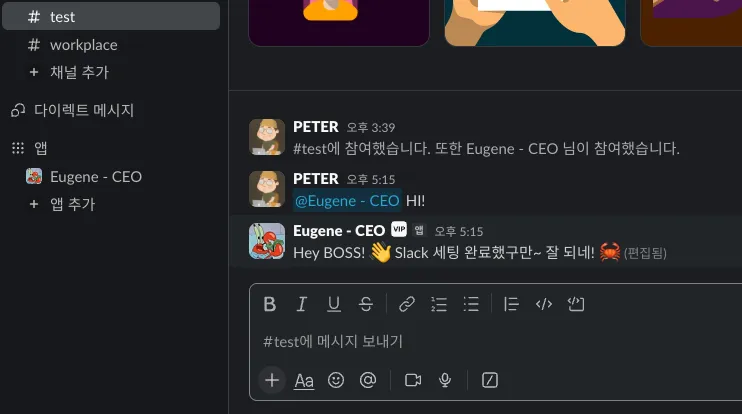
TIP
Setting the Message Loading emoji
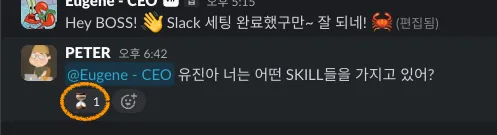
- When chatting with OpenClaw, there are times you might wonder if a requested task is taking a long time or if it's in the middle of responding. In such cases, you can make it display an indicator like the one below to show that the AI has properly seen your message and is working on it.
-
This feature is possible only by actually editing the
~/.openclaw/openclaw.jsonfile as follows.- Inside channels > slack, just add the line below at the very end.
"typingReaction": "hourglass_flowing_sand", -
Don't forget to add a comma (
,) on the line right above it.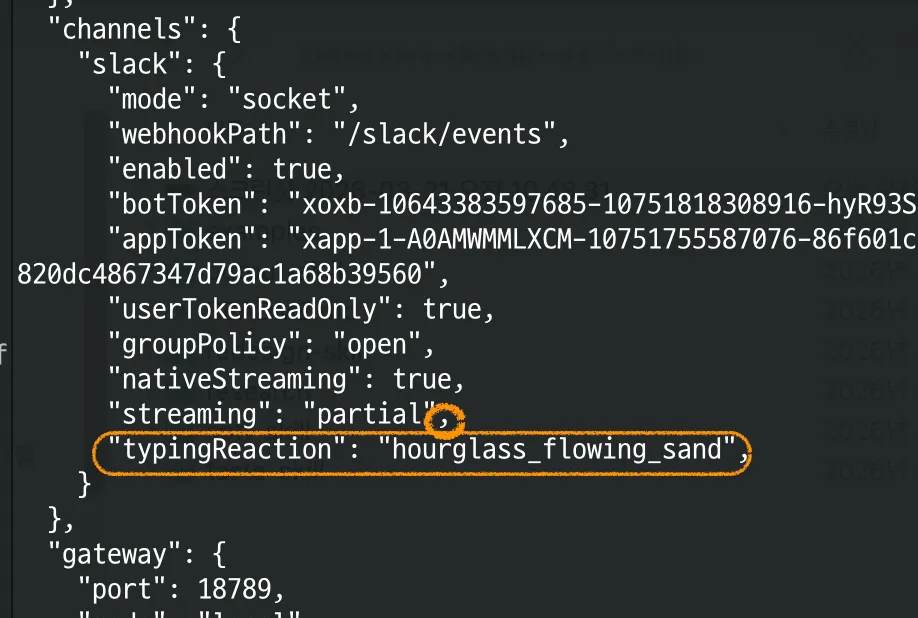
-
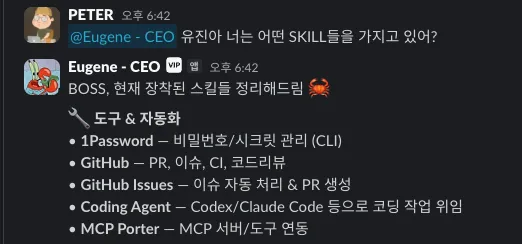
After saving, as you saw above, OpenClaw will add an hourglass emoji to my message before it replies, and once the reply is finished, it will automatically remove the emoji.👍👍👍
Conclusion 🍳
- Personally, this is just as amazing and fun as when I first met Claude Code.🥺🥺🥺
- It does a great job even if I ask it to create a folder on the desktop and work on a project. I can also connect it to Obsidian and make it act as a personal assistant that checks my schedule and automatically reports my to-do list for the day. This truly is the dawn of an era of in.fi.nite. pos.si.bil.i.ties..!👾
- I'm going to keep on making more and more fun things!🤩🤩🤩


2 comments
2편 기대하고 있습니다 :)
감사합니다 :)!! 열심히 작성 중입니다 🔥🔥🔥
Please login to leave a comment.